

Nuke Match Move
In this task we used match move to add a 3D asset to a scene.

After reading in the footage and the distortion grid I created a frame range node to limit the footage to the clip I am using. Using a write node I created a render of the footage in the .tga format. The LensDistortion node was used to undistort the footage. I first made the node on the distortion grid, then copied it over to the rendered footage.

The CameraTracker node creates many different points that are tracked with the camera. This node also allows you to input the focal length of the camera - in this case, the BlackMagic Cinema 2k.

These tracked points are generated in a 3D environment.

These tracked points are generated in a 3D environment.

In the AutoTracks tab you can see a graph that shows the distance between the points. I set an error threshold so that bad tracks can be marked as rejected and deleted.

Under export there is an option to create a Scene+. This creates a selection of nodes including a scene and a virtual camera in the 3D environment.
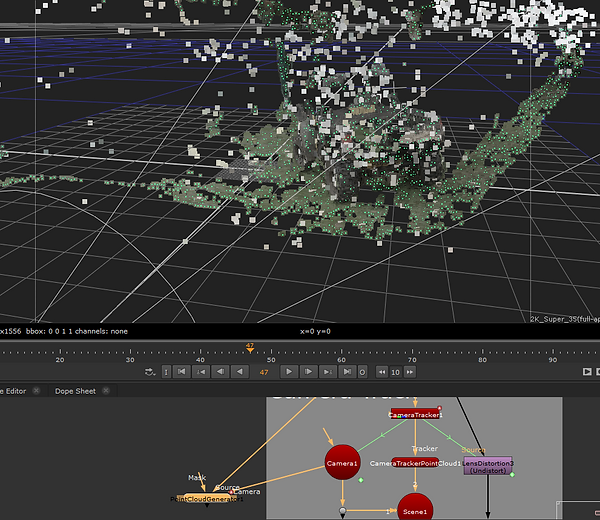
The PointCloudGenerator node creates various points with textures. I used this point cloud to map out the placement of a 3D cube.

I added a checkerboard to make the cube more visible. Then, using the GeoWrite node I rendered out the 3D scene into an FBX file.

Once I had finished with this I moved on to the chromeball in Photoshop. In File > Automate > Merge to HDR Pro I added the chromeball images. The chromeball would be used to create the lighting information for the model. After saving these I began using the lasso tool to hide parts such as the hi-vis jackets and chromeball stand that could make the lighting information inaccurate. Using the content aware fill (right click selection) I could make a blurry patch that covers up the selected area with colours from the surrounding area. When doing this it is better to select small parts individually to make less blur.


After the editing was finished I saved both files as an EXR, for which I had to set both files to 32 bit. I then read these EXR files into a new Nuke project. I used a crop node to remove the black space around the sphere. I then added a SphericalTransform node which I used to unwrap the sphere and adjust the position of the center.

